NID enumeration
| Command: | NID |
| Menu path: | Access Network > Automatic Enumeration > NIDs |
| Icon: | 
 |
| Functional description: | The command performs automatic splicing of NID twisted pairs on DT connection module. |
Running Automatic Enumeration > NIDs
command executes
automatic splicing of NID twisted pairs on DT connection module.
Automatic splicing is made based on enumeration (position) of a NID on
DT disconnection module.
This command is most frequently used to produce documentation of the as-built status when the connection of NIDs on DT disconnection module is made and differs from the one obtained automatically (according to the user’s distance from DT).
| Recommendation: |
| In order for this command to work properly, it is recommended
that Automatic Enumeration > Network
Enumeration command should be run first. Manually perform pre-enumeration (Users > Change Data on WD box) of NIDs where the position on the disconnection module, obtained by automatic enumeration, differs from the actual status in the field. Once the manual entering of NID positions on DT disconnection module is complete, run Automatic Enumeration > NIDs command. Depending on the position on the disconnection module, the command will perform the synchronization of automatic splicing for all NIDs. |
Procedure
From the main menu run Access Network > Automatic Enumeration > NIDscommand.
Before starting the enumeration procedure, the program checks for network
regularity and reports errors, if any (Figure 1).
At this point the user should correct the listed errors, and then again
run Access Network
> Automatic Enumeration > NIDscommand.
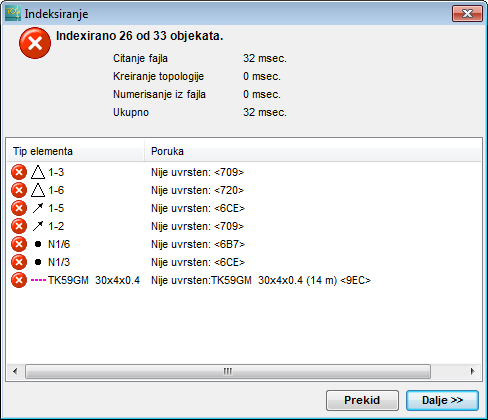
Figure 1
After running the command, Automatic Splicing of
Manually Enumerated NID (aerial line) window opens (Figure 2).
It is used to select automatic splicing to be performed.
Serving Area Enumeration list shows the found
status and is not worked with at this point
(if some changes are made on it, they will not have any effect).
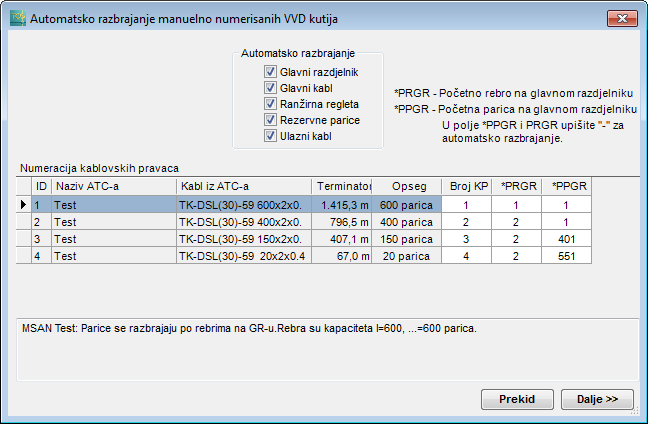
Figure 2
After clicking Next, the program simply performs automatic splicing without sending any message.
If we view the group of NID automatic splicing
for a selected NID in
Properties window, we will see that the automatic splicings are entered.