Inventory List
| Command: | Inventory List |
| Menu path: | Access Network > Documentation Generating > Inventory List |
| Icon: | 
 |
| Functional description: | The command automatically generates the inventory lists. |
Using the Inventory List command we generate
an inventory list for each cable serving area.
This part of documentation can not be updated. In there were any changes you need to re-generate the inventory list.
| Note: |
If there are multiple cable serving areas in the drawing,
they all have to be enumerated. |
Procedure
From the main menu run Access Network > Documentation Generating > Inventory List.
Before continuing, the program checks the network correctness and reports
errors, if any.
At this point, the user has to correct the listed errors and then re-run
Access Network > Documentation Generating
> Inventory List.
After that, Select Printer window opens (Figure
2).
(If the user doesn’t correct the error, but clicks on Continue button
(Figure 1) of Indexing window to continue
the procedure,
the Inventory List will include only those elements properly connected
to the exchange.)
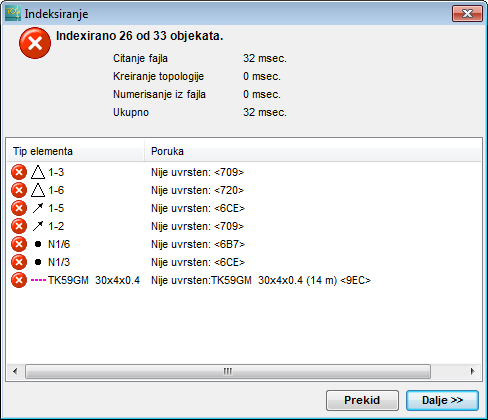
Figure 1
Window for printer selection (Figure 2).
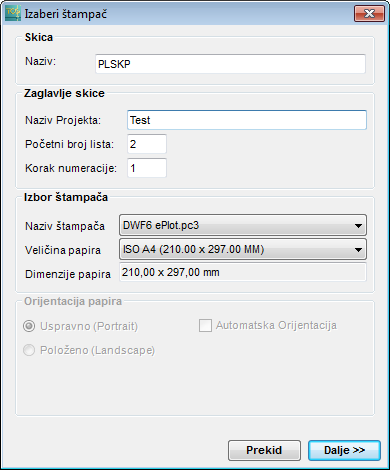
Figure 2
The window for setting printing parameters contains the following items:
Layout:
- Name: (name of layout - will be displayed in the layout tab)
Layout header:
- Project title: (name of the project - will be displayed in the inventory list header)
- Initial sheet number (number of sheet - will be displayed in the corner of the inventory list header)
- Enumeration step: (enumeration step
defines the method of sheets enumeration,
e.g. if the step=2, and the initial number of sheet is 1, sheets will be numerated as 1,3,5,7 ...)
Printer selection:
- Printer name: (choose an available printer from the drop-down list)
- Paper size: (choose the paper format from the drop-down list)
- Paper dimensions: (display of paper dimensions in relation to the above selected format)
Paper orientation:
- Auto Orientation - choose this option when you want to leave the paper orientation choice to the program
- Portrait
- Landscape
When all parameters are set, click Continue
to generate the inventory list with a frame and a header.
Figure 3 shows an example of inventory list generated in TeleCAD-GIS.
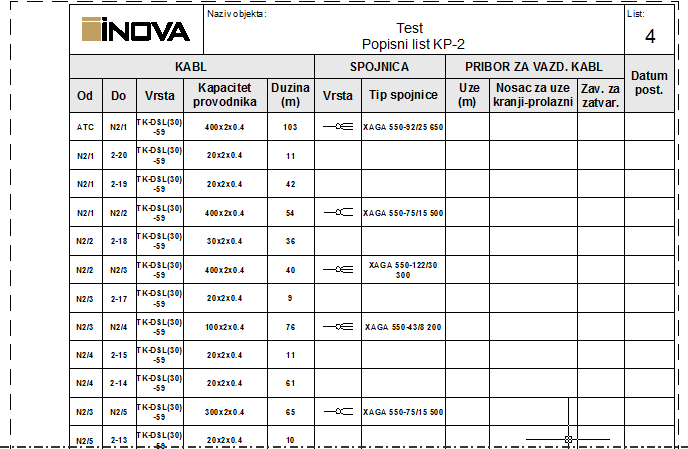
Figure 3