Insert Data Table
| Command: | Insert Data Rable |
| Menu path: | Layouts > Insert Data Table |
| Icon: | 
 |
| Functional description: | This command inserts a data table into the selected layout or replaces existing data table (or header). |
Insert Data Table command inserts a data table
into the selected layout.
If there already is a data table or a header in the layout they
will be replaced by the new data table.
To add the data table, the layout needs to have a page with a frame.
Procedure
Before running the command you need to open the layout in which you wish to add (or change) the data table.
Then, from the main menu run Layouts > Insert Data Table.
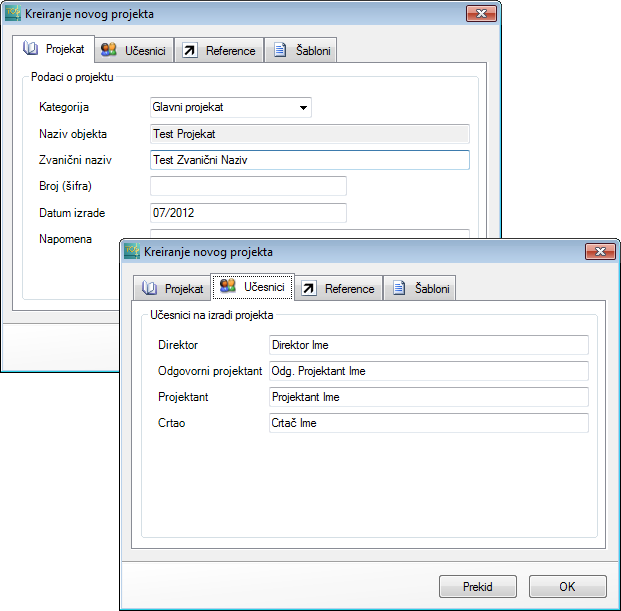
If the data table is added to the layout with no header or data chart, Create Data Table window opens (Figure 1). If the data table is added to the layout which already has a data table (or header) then Change Header Data window opens.
Both windows contain same entry fields (therefore the procedure is the same), the difference being that Create Data Table window is initially filled with higher level data as described in „Forward layout table data” section on this page, and Edit Table Data window is initially filled with data from the data table (or header) already prezent in the layout.

Figure 1
The window contains the following items:
Drawing data:
- Drawing Name - (User enters the drawing name or selects it from the drop-down list)
- Drawing Number - (User enters the number of the drawing)
- Drawing Scale - (User selects the
scale from the drop-down list)
Project participants:
- Name and surname of the chief designer - (User accepts the offered input or enters the name and surname)
- Name and surname of the designer - (User accepts the offered input or enters the name and surname)
- Name and surname of the draftsman - (User accepts the offered input
or enters the name and surname)
Project data:
- Object Name - (User accepts the offered input or enters the object name)
- Project Number - (User enters the object number)
- Date - (User accepts the offered date or enters the date (offered is current month))
* * *
Depending on whether there’s already a data table (or header) in the
layout,
Create button or Modify
button will be displayed in the bottom of the window.
Click on Create (Modify)
to create a new data table (Figure 2),
in accordance with the data entered in Create Data
Table window (or Edit Header Data window).
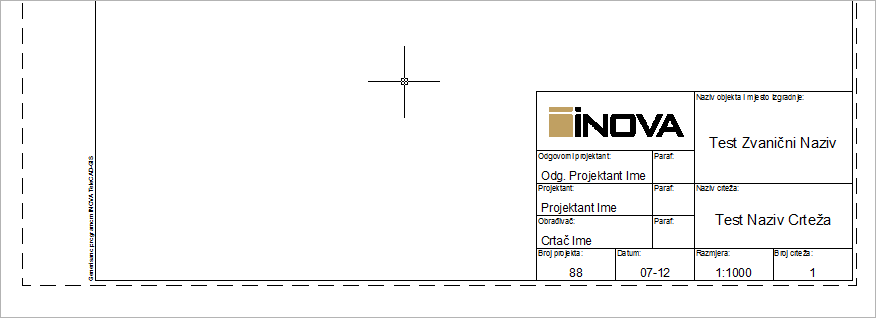
Figure 2
Forward layout table data
The data used for data table fields can be entered at different levels:
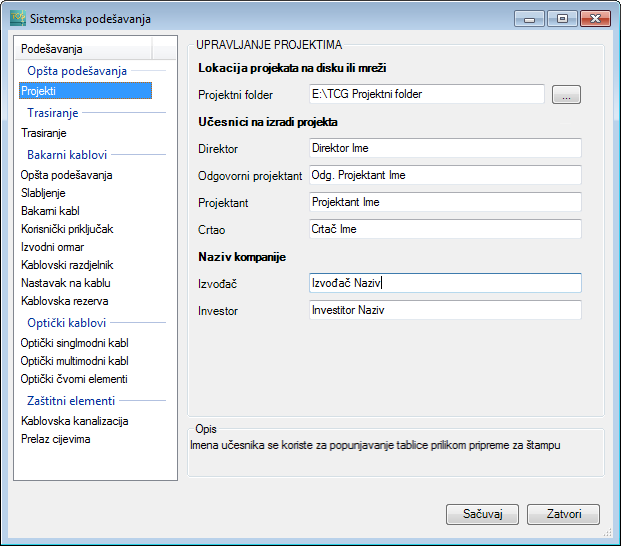
- At the level of system settings
- At the project level
- Immediately prior to the creation of data table
- Directly in the data table on the layout
The highest level is the level of system settings.
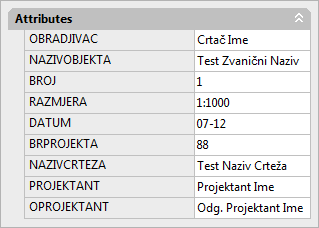
Regardless of the data entry level, they are forwarded to the next level
and at that point the user decides whether to accept the forwarded data
or manually change them.
If you change the data, then those new data will be forwarded to the next
level
until the data table itself is eventually filled in.
(The data used in the example are arbitrary and the only goal is to show how they are forwarded from one level to another.)