Predefined Duct Bank
| Command: | Laying 1 x 2 Ducts Laying 2 x 1 Ducts Laying 1 x 3 Ducts Laying 2 x 2 Ducts Laying 2 x 3 Ducts Laying 3 x 3 Ducts |
| Menu path: | Duct bank > Predefined Duct Bank > one of the above commands |
| Icons: | 
 | |   | |
  | | 
 | |   | | 
 |
| Functional description: | The command lays down a duct bank with the property "existing" and pre-defined number of ducts, along user defined path. |
Predefined Duct Bank commands enable the laying
of duct bank with pre-defined properties.
By laying in this way, you’ll get the duct bank with the following properties:
Properties
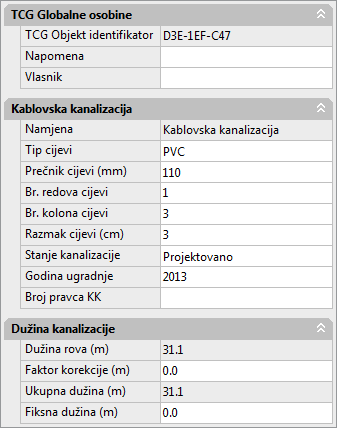
These properties can be changed through the Properties window (Figure 1).
Entering and changing properties through the Properties
window is the same for all types of duct bank,
and they are explained on Duct
Bank Properties page.
Duct bank laying procedure
The process of laying is the same for all three cases (designed, existing
and predefined).
The only difference is in the properties assigned to duct bank after laying.
This procedure is described on Duct
Bank Laying page.