Fiber circuit name
Fiber circuit name can be defined in two ways:
- in the Fiber Splicing - Distribution Frame window (described on Defining fiber circuit name page)
- on FO Schema (described on this page)
Assigning fiber circuit name
Fiber circuit name is defined using the Fiber Info window which is opened:
- By double-clicking on the fiber or group of fibers.
- By right-clicking on selected fiber or fiber group (Figure 1) and running the Fiber Info command from the context menu.
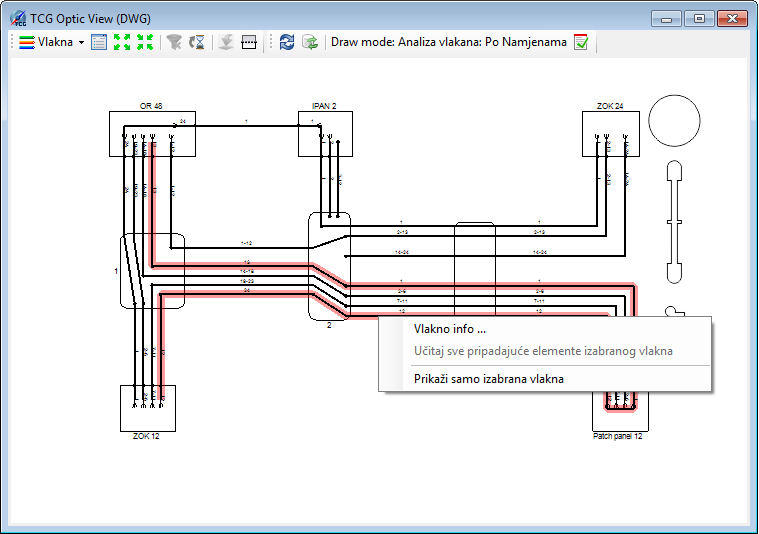
Figure 1
Fiber Info window (Figure 2) has two tabs:
- General (described in detail on this page) and
- Fiber Details (described in detail on Tab: Fiber Details page)
Tab General contains two frames:
- Circuit Name and
- Warnings - refers to errors and is described on Errors page.
Circuit Name
Current fibers circuit name is displayed in the text field (Figure 2)
(if not yet allocated it says: "(none)", and if it is inconsistent,
there are 3 question marks (???)).
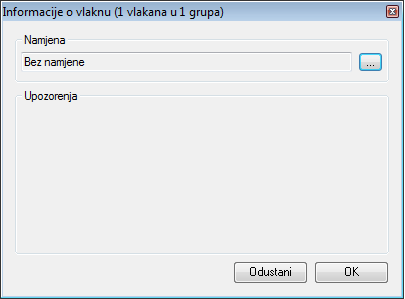
Figure 2
Assign the circuit name to the fiber by clicking on icon ( ) located at the end of
the text field.
) located at the end of
the text field.
Fiber circuit name
window opens (Figure 3).
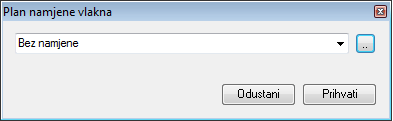
Figure 3
Window: Fiber circuit name
This window contains a drop-down list from which we select the predefined
circuit names (circuit names are stored in the codebook).
The method is as follows:
First, type a part of the circuit name (already existing in the codebook)
in the drop-down list field.
As you enter text, the drop-down list is automatically filled with all
circuit names that contain the entered text (Figure 4).
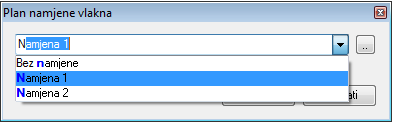
Figure 4
Left-click to select the desired circuit name.
The circuit name is displayed in the text field (Figure 5).
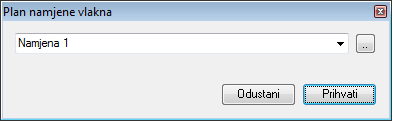
Figure 5
Click on the Accept button to accept the selected circuit name (and return to Fiber Info window (Figure 8)).
If the needed circuit name doesn’t exist in the codebook,
we can create it by opening the Codebook (Figure
6). Open the Codebook by clicking on ( ) in the Fiber circuit names codebook
window (Figure 5).
) in the Fiber circuit names codebook
window (Figure 5).
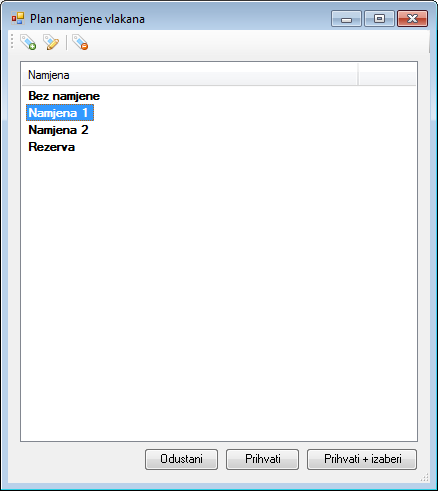
Figure 6
Fiber circuit name codebook
Codebook has:
- Its own toolbar
- List of circuit names
- Buttons
Toolbar
Toolbar contains the following tools:
 - Add
new circuit name
- Add
new circuit name
Add new circuit name by clicking on this icon. The circuit name item should then be given a name. - Change
Change circuit name previously selected in the list. - Remove
newly created circuit name
- Remove
newly created circuit name
Remove newly created circuit name from the list. It is possible to remove only new circuit names created by the user. Circuit names that are loaded from GIS database can not be removed.
Circuit name list
It contains a list of all circuit names for fibers present in the drawing.
Buttons
In the bottom of the codebook there are three buttons:
- Cancel
Cancel the changes made in the codebook - Accept
Saves the changes made in the codebook - Accept + Select
Accepts the changes and uses the selected circuit name
After creating a new circuit name in the codebook,
click on Accept + Select to go back to Fiber circuit name
window.
Figure 7
The new circuit name is selected in the drop-down list.
Click on the Accept button to return
to Fiber Info window (Figure 8)).
Figure 8
After clicking the OK button in Fiber Info window, a window opens warning you that fiber circuit names will be changed (Figure 9).

Figure 9
By clicking on OK, the circuit name is
defined along the whole fiber circuit (on all elements through which the
fiber passes).
Repeat the process for all fibers to which you want to assign a circuit
name.
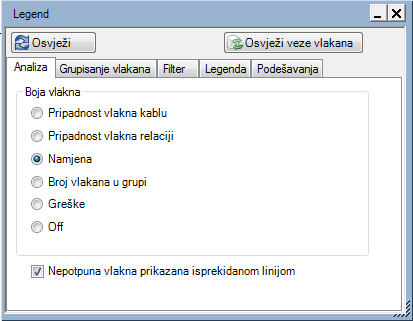
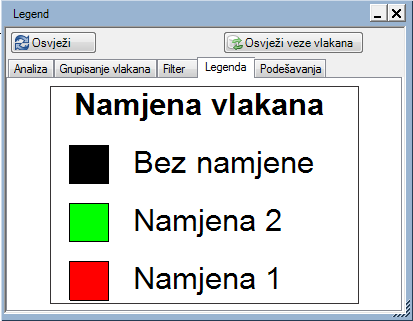
Figure 10 shows a schema with fibers colored in circuit names colors.
Schema settings are shown in Figure 11 and the legend describing the scheme
in Figure 12.
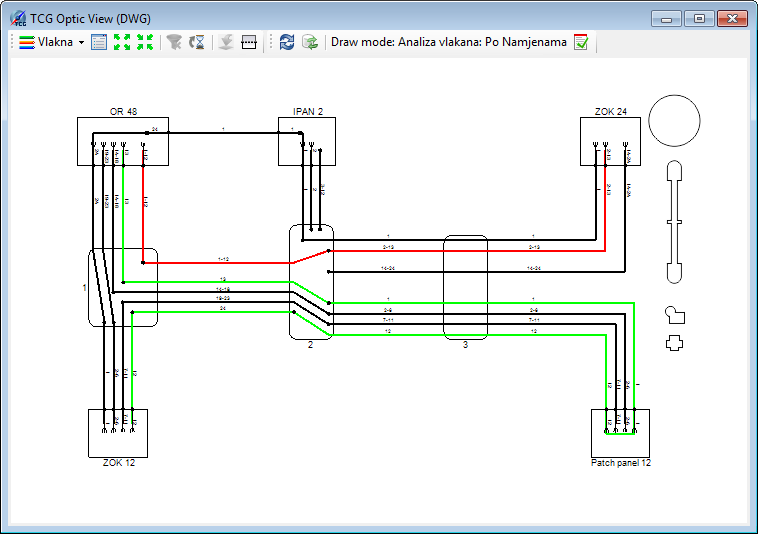
Figure 10
Figure 11 |
|
Figure 12 |
Errors
Working with errors is described on Errors page.