Header with the date
| Command: | Header with the date |
| Menu path: | Layouts > Set Form > Header with Date |
| Icon: | 
 |
| Functional description: | This commands allows you to adjust the content of the header with the date to a certain project or organization. |
Header with Date command allows you to adjust
the content of the header with the date
to a certain project or organization.
| Note: |
Commands:
are very similar, so it is enough to study just one of them. |
Modify header with the date
By running Layouts
> Set form > Header with Date command, you open file „ ZAG_D.dwg
”.
This file contains the drawing of the header with the date (Figure 1) which
can be changed.

Figure 1
| Note: |
Before changing the header, make sure you study its elements. |
After modifying the file (e.g. changing the company’s logo),
changes need to be saved by running Set Form >
Save Form Changes
(this command is explained on Save
Form Changes page).
From this moment, when you insert header with scale in each new layout,
the new (changed) header with the date will be inserted.
Modify header with the date in the current drawing
In the manner described above you can change the header with the date
for each future use.
The changes won’t affect the drawings in which you already used some older
header with the date.
For the changes in the header to take effect in the current drawing,
apart from changing the header in the above described way,
you need to change the header block which is already in the drawing.
This is done in the following way:
Open the drawing in which you want to change the header with the date.
From the command line run INSERT command.
Insert window opens (Figure 2).
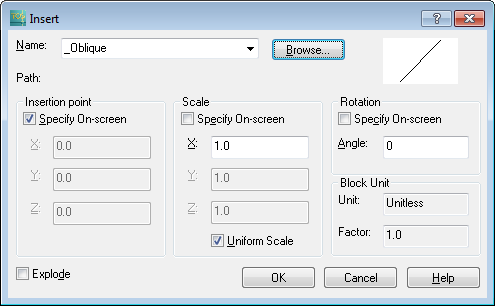
Figure 2
Click on Browse to open Select
drawing file and
find the corresponding DWG file (in this case it’s ZAG_D.dwg) (Figure 3).
| Tip: |
ZAG_D.dwg is located in \AppData\Roaming\INOVA\TeleCAD-GIS
20XX\Templates\Headings folder. |
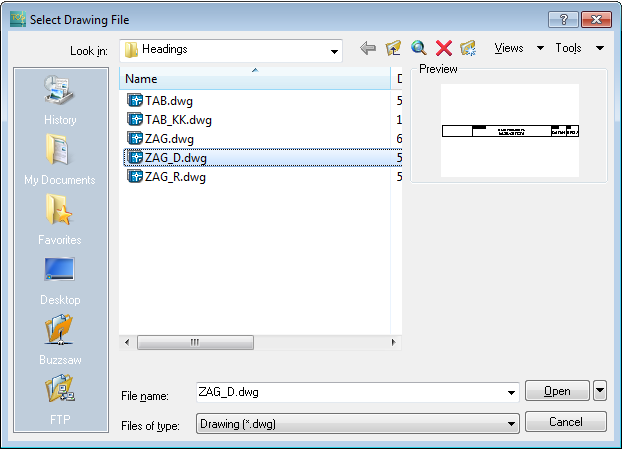
Figure 3
Select the file and click Open, after which you go back to Insert window (Figure 4).
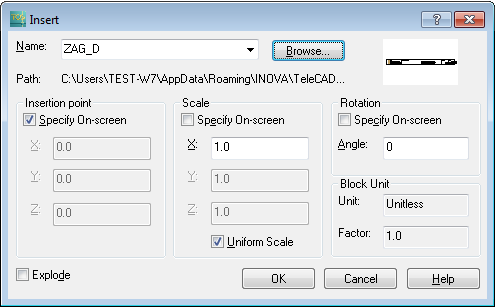
Figure 4
Click on OK to insert „ZAG_D” block into
the drawing.
The program warns you that there’s already a block with that name in the
drawing, so it will be overwritten if you insert the new block (Figure
5).
It also warns you that all instances derived from this block will be changed.
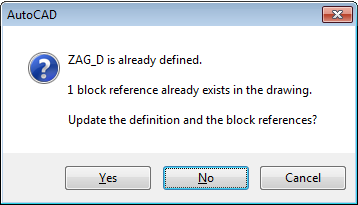
Figure 5
That is exactly what you want to do.
Clicking on Yes, the block and all its instances
in the drawing will be updated (in other words all headers with the date).
The program now continues inserting the instances of the block and asks
you to specify the insertion point and texts to be displayed inside the
header.
You have already finished doing all that you wanted to do, so you
can cancel the rest of the procedure (by pressing ESC).
After this, all headers (without scale and date) will be changed in the current drawing.