Page with frame
| Command: | Page with frame |
| Menu path: | Layouts > Page with frame |
| Icon: | 
 |
| Functional description: | The command creates a new layout containing a page with a frame. |
| Introductory note: |
Creating a page with a frame is the first
step towards creating a complete layout.
Steps must be performed in the given order and the program will warn you if you skip a certain step. When you run any of the commands that automatically generate
layouts for printing, |
In order to print anything in TeleCAD-GIS, you need to create a layout
because the layout is the very thing that is printed.
Page with frame does exactly that, it creates
a layout.
In addition, the frame of the layout's page is created which is important
as TeleCAD-GIS uses it to
determine the position of layout header
(or data table).
Procedure
From the main menu run Layouts > Page
with frame command.
Select Printer window opens (Figure 1).
You need to set the printing parameters in it.
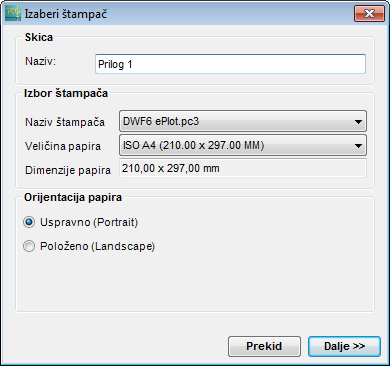
Figure 1
The window for setting printing parameters contains the following items:
Layout:
- Name: (name of the layout - will be displayed on the Layout tab at the bottom of workspace)
Printer selection:
- Printer name: (choose an available printer from the drop-down list)
- Paper size: (choose the paper format from the drop-down list)
- Paper dimensions: (display of paper dimensions in relation to the above selected format)
Paper orientation:
- Portrait
- Landscape
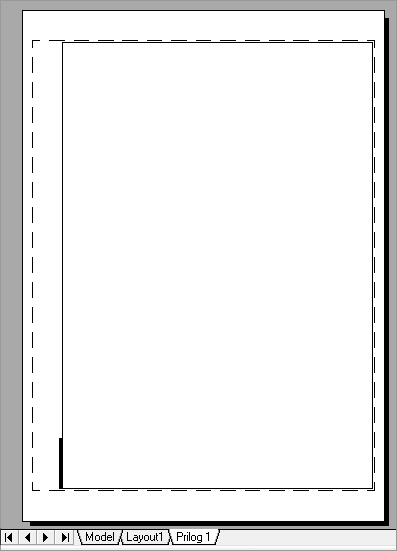
When all parameters are set, click Continue
to generate the layout (Figure 2).
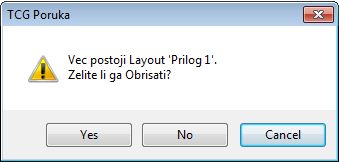
If there’s already a layout with the same name, the program will warn you
that it will be overwritten by the new layout (Figure 3).
Figure 2 |
Figure 3 |