Command: Insert Block
| Command: | Insert Block |
| Menu path: | Layouts > Insert Block |
| Icon: | 
 |
| Functional description: | This command allows you to select an existing block and place it in the layout in order to print it. |
Using Insert Block command we open TCG
Block Manager, through which we take the existing block and place
it into the layout.
| Note: |
In order to use a certain block, we have to previously create
it. |
Preparation
Before you start the process of inserting a block into the layout, you need to create the layout itself, and then the header or the data table.
Creating layout that contains page with frame is described on Page
with frame page.
Creating headers is described on Insert
Header page.
Creating data table is described on Insert
Data Table page.
After creating the layout, continue with the process of inserting the
block (i.e. placing the block into the layout).
The layout in which we are to place the block has to be active
at the moment of running Insert Block command.
Procedure
From the main menu run Layouts > Insert Block
command.
TCG Block Manager window opens (Figure
1).
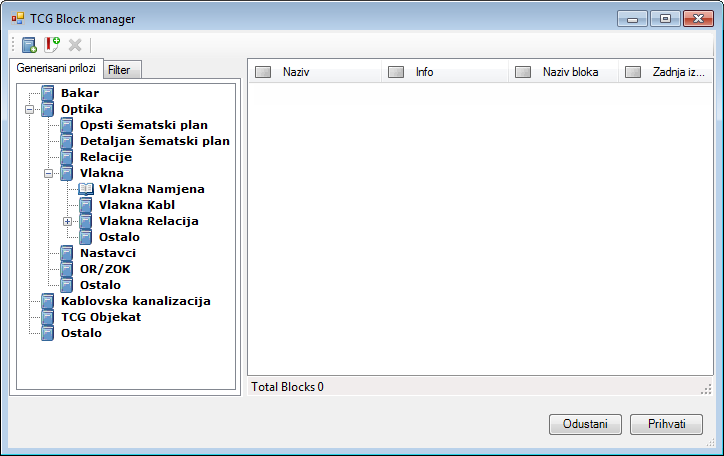
Figure 1
By browsing the folders, using the “Generated blocks" or "Filter”
tab, we get a list of available blocks (Figure 2).
(See TCG Block Manager page for more
details about this window and its commands.)
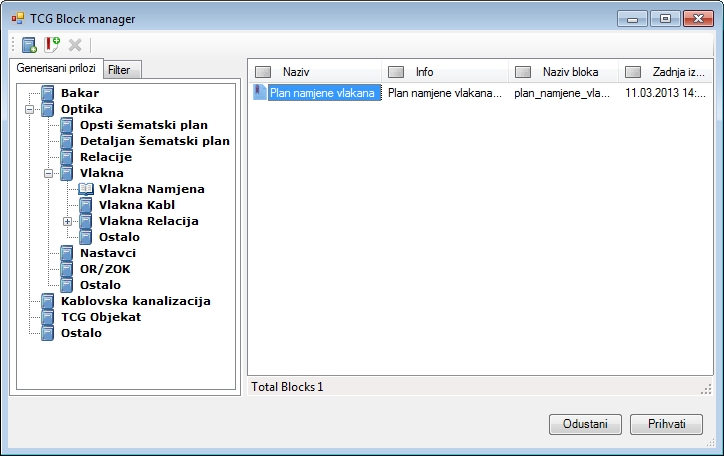
Figure 2
Select the desired block in the list (in the example we’ve selected “Circuit name” block), and then click Accept.
TCG Block Manager window closes. You are
now in the previously prepared layout (Figure 3).
The cursor is displayed in a form of a plus sign (“+”) with a message
next to it instructing you to specify the starting point.
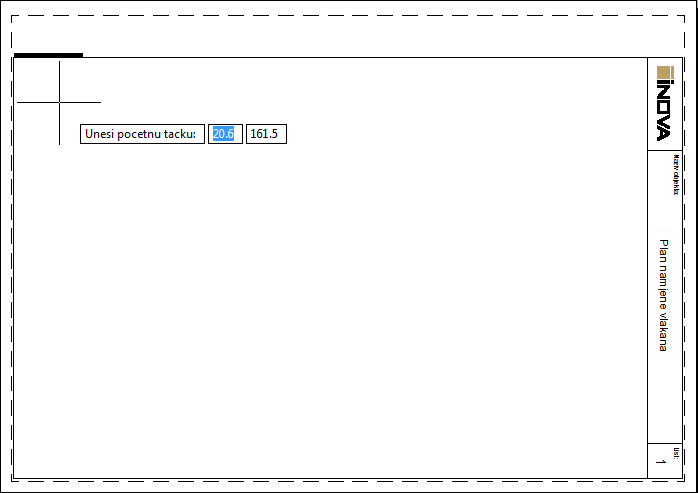
Figure 3
By left-clicking, specify the start point in the layout at which you
want to set the vector graphic (i.e. block).
Move the mouse until you occupy the desired area (Figure 4).
When moving the mouse, the future block area is displayed as a red rectangle.
The block is always stretched proportionally in both axes (x, y).
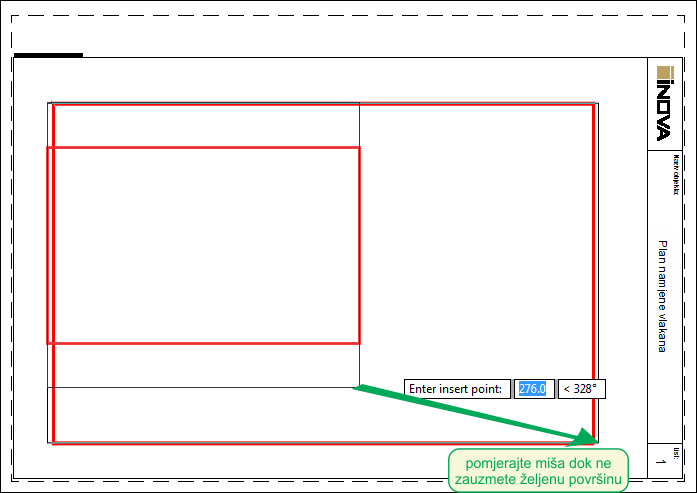
Figure 4
When you are satisfied with the block size, left-click again to finish
the procedure.
Selected block is placed in the layout (Figure 5).
Figure 5
The same block can be set an unlimited number of times at various layouts
and even in the site plan drawing, if necessary.
The same block can be displayed in different scales.
If you need to edit the block, do it in the standard way by running AutoCAD’s Block Editor command, located in the context menu (right-click on the block > Block Editor). In this way, all block instances derived from this block will be changed, regardless of the layout they’re in.